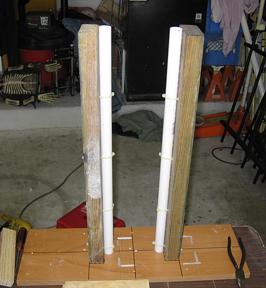
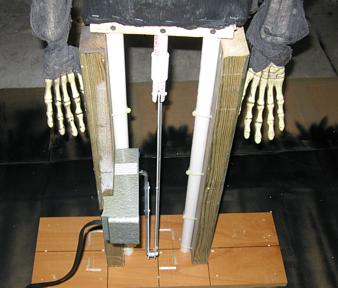
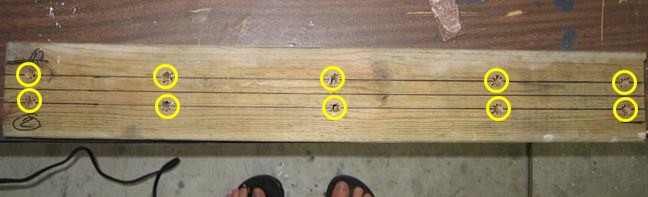
I used a scrap piece of wood (1" x 8" x 24") for the base. As you can see from the above photo I marked out the center line and where I wanted to place the 2x4 supports (yellow rectangle). How far I spaced the 2x4 apart was determined by the width of the skeleton that was used.
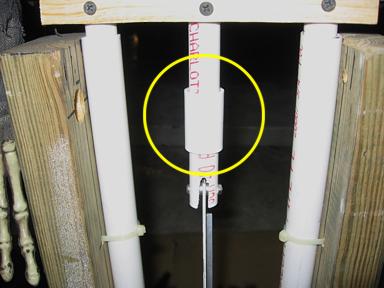
Two 24" long 2x4 were used because I wanted the skeleton to rise up about 20" above the tombstone. As you can see from the photo once again the center line was marked. Holes were drilled to allow me to use zip ties to hold the 3/4" PCV pipe in place in four spots.
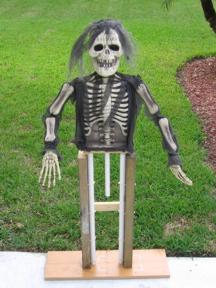
The following is just a guideline on how I made P.K Boo skeleton. I wish you luck if you try to build your own. I was able to find a skeleton that you stick in the ground at Wal-Mart. This concept will also work for other items but you need to change some of the dimensions. The whole idea was to make this prop with what I had around the garage and for cheap. This prop was placed behind a 2' x 4' 2" thick Styrofoam Tombstone.
The each 2x4 was mounted vertically on the base by three 3" long #8 screws. The 3/4" PCV pipe was then zip tied to the wood. If you wish you can also use U clamps but that was add cost to the project.
NOTE: I ran PK Boo on Halloween night for 5 hours with no problems using the zip ties.
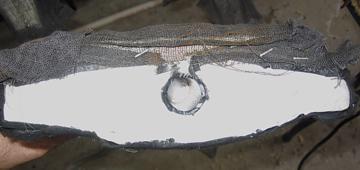
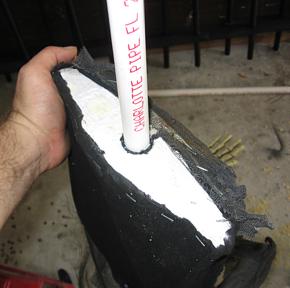
The black paper on the bottom of the skeleton was removed to get to the Styrofoam. I used the existing hole that the skeleton already had for the ground stake.
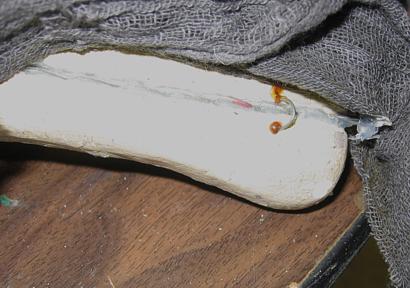
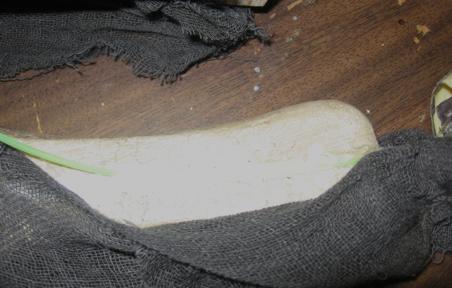
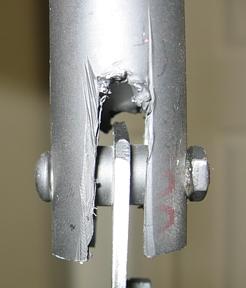
Here is the piece of the 12" PCV inserted into the skeleton. This PCV will later be glued in place and be part of the lift mechanize.
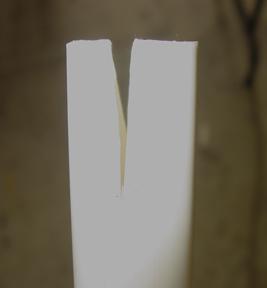
On a piece of 12" long 1/2" PCV a V notch was cut at one end to fit in the hole at the bottom of the skeleton.
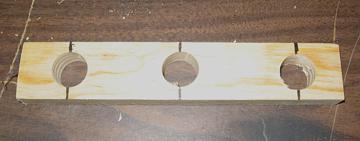
Cut a piece of 1"x2"x8" (the width was to fit the skeleton) of fir strip. The tree hole were drilled using a 7/8" spade drill bit. This piece was glued onto the bottom of the skeleton using Liquid Nail.
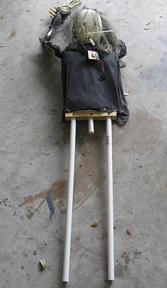
After the glue had dried then two 25" long 1/2" PCV pipe were attached. The PCV is held in place with one 1" dry wall screw. This method allows the PCV to have some side to side movement. See below photo.
Here is what the skeleton looked like at this stage. The 1/2" PCV pipe slides down into the 3/4" PCV pipe. At this stage you want to make sure the skeleton can move up and down freely. If not then make adjustment until it does.
I didn't like the stiff wire used in the Skeleton's as I wanted to a attach the hands to the top of the tombstone. The wire was removed from the Styrofoam bones that ran through the middle of the arms. Care needs to be taken as not to break the Styrofoam bones
Here is a photo of the linkage arm attached to the prop.
A 1/2" PVC coupler was used to attached linkage arm to the prop. The bottom part of the coupler was glued to the 1/2" PVC pipe. The top part was not glued so it could easily be removed from the prop.
Here is a close up of the notch that was cut into the lower part of the PVC pipe to allow the linkage to move freely.
Once the wire is removed there will be a nice groove in the center of the bone. Trimmer line (.080") was hot glued in place of the wire. Take your time and do a small section at a time allowing the hot glue to dry. During this time you may need to hold the trimmer line down into the glue. I used a toothpick to do this as it can easily be broken off once the glue dries. Also make sure you leave about a 1" spacing between the bones to allow for movement.

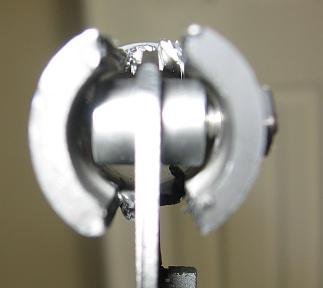

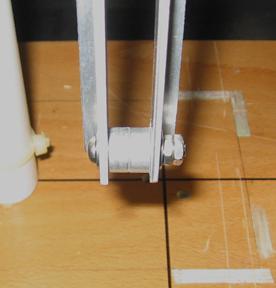
The bottom view shows some spacers that were inserted to keep the linkage center in the notch.
Here is a close up view of the spacers used at the pivot point of the linkage.
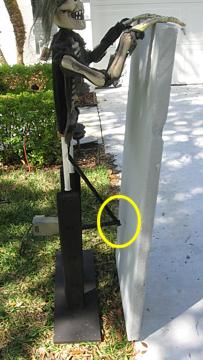
Zip tie double stick hold down pad were placed on top of the tombstone where the hands were zip-tied in place.
Make sure the linkage arm does not make contact with the tombstone.

Above are the dimensions
I got the idea for making the pop up skeleton from the following to location. (Thank You)
Perron Halloween Productions copyright 2007